 Nikon F100, 1999 [****]
Text and some pictures © 1993-2026 Guillaume Dargaud. Pictures of equipment from the manufacturers.
Last updated on 2025/10/27
"Why is there so much month left at the end of the money ?"
Note: some of the illustration pictures shown here were taken from a pictorial history website, others from the corresponding company websites.
The headers with a grey background are the equipment I currently use. The rest was sold, lost or destroyed in a rage years ago...
Warning 1: Most of the equipment reviewed here is obsolete. You have to replace their rating in historical context.
Warning 2: Those opinions below are just that, opinions (just like the rest of my site BTW) and they won't substitute for a serious magazine test. But I've used some of that equipment for long enough to have a few gripes and praises. And I'm not being paid full of commercials to write this up...
So what's my setup ? In short from 1990 to 2000 I used a Nikon F801s. Then from 2000 to 2006 I used a Nikon F100, a Ricoh GR1 and a GR21. Then since 2007 a Fuji S5 pro and a Ricoh GRd, Ricoh GX100 and now (2009) the Panasonic LX-3.
Note: Rating from [0] (Bad, really bad) to [*****] (Great, truly great). Some stars may be between parenthesis to mean a general purpose use vs a very specialized niche use. For instance an 8mm fisheye may get *(**) to mean it's not very good for general photography but good for assembling panoramic shots and other specific purposes. Also the ratings refer to the time when I was using them. If the title is not in gray background, then it's obsolete.
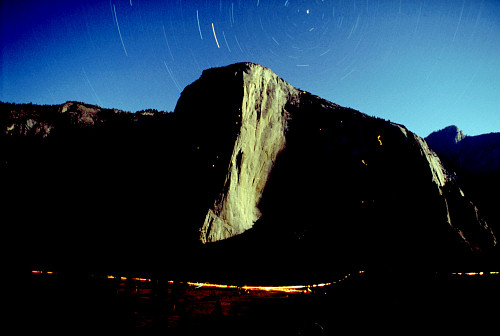
As strange as it seems I purchased this 25 year old camera in 2004 for a very specific purpose that no modern camera can achieve: long night exposure at any temperature. And when I say 'any', I mean it. Remove and throw away the battery. Add a cable release, a stable tripod, a wide angle fast lens and you are set for all night exposures, star rotation or astrophoto without fear of the battery dying on you. If you already have a set of Nikon lenses, it makes a great complement.
![[F401s.gif]
Nikon F401x/N4004x](Matos/F401s.gif)
My first camera, back in 1989 (well, it was a F401s more exactly). I kept it a year and decided it wasn't enough, so I got an F801s. In particular, it lacks viewfinder speed/aperture information, a DOF preview button... On the plus side, it has a built-in flash and no gimmicks (just aperture/speed dials).
![[F801s.gif]
Nikon F801s/N8008s](Matos/F801s.gif)
IMHO one of the greatest AF camera ever made. Its top characteristics: 1/250s synchro flash, depth of field (DOF) preview, 2nd curtain synch with SB-24 flash and a decent price.
I had one from 1991 till 2000 when it burnt in our car during our honeymoon. I used it to shoot mainly climbing, landscape, portraits and weddings.
I also had the MF-21 back for tricks like long exposure (night pictures with star rotations), automatic multiple exposures or long-delay self-portraits.
The only trouble I ever had with it was when shooting in very high humidity (scuba diving or canyoning, with the camera inside a waterproof bag), it would give me error messages and refuse to shoot.
You can now find them on eBay for very cheap and they make great backup cameras, except with HSM/AFS lenses which work only in manual.
Nikon F100, 1999 [****]I got one to replace my F801s (RIP) as it's supposed to be the successor of the F90x which was itself the successor of the F801s. I have to say that at first I wasn't too happy about it. Basically my gripes are: first, it's very expensive; 2nd, it's no different than an F801s !
![[F100.gif]
Nikon F100 camera](Matos/F100.gif)
OK, the AF is much faster (particularly with HSM / AF-S lenses), and they have improved some characteristics for which I couldn't care less (5 img/sec, infinite multi-exposure...), but I don't like the user interface all that much:
Energizer Litheon batteries. 4 rolls with the 2nd set ! I used to do about 100~200 rolls with the F801s... This happened on the first rolls I took, now the power use is normal. Strange.OK, after quite some time fiddling around with the custom settings, here's how I like to use it now: Auto Focus set to Continuous (AF-C), Autofocus not activated with shutter release button (CSM4=1). When you want to use the AF, you press the [AF-On] button with the thumb. If you want to manual focus, just focus with the lens, no buttons (you need an HSM of AF-S lens for that). It's fast and convenient because it adapts to many different situations: you can follow an object by keeping you thumb on the AF-On button and shoot at the same time; you can autofocus with your thumb and then refocus it manually; you can focus on the object you want to shoot, move the camera to get the correct exposure (even if different distance), keep the shutter halfway to lock the exposure, reframe again and shoot. It covers just about every situation in a quick handy way.
Most convenient Custom Mode configuration (IMHO, everyone has his own preference):
|
|
If you are thinking about getting the F100 and some lens, go for ultrasonic lenses (Nikkor AF-S or Sigma HSM) as they are so much more convenient... BTW there is a (cluttered and sometimes aggressive) mailing list for the F100. And don't forget to get a SB-80DX flash.
![[NarrowsDihedral.jpg]
Test image for the Fujifilm Silvi F2.8 with flash at 24mm - Jenny climbing the 5.9 dihedral at The Narrows, the wide angle really makes a difference](../Climbing/Colorado/NarrowsDihedral.jpg) This weird little camera with a 24-50mm zoom (f2.8-5.6) is currently sold in Japan under the name Silvi F2.8 and in Europe under the name ZoomDate F2.8 (not sold in the US, sorry). Besides having the widest zoom of any P&S camera, it offers a few additional tricks: an infrared remote control (which I already lost), a self portrait indicator (for when you hold the camera aiming at your face) and two triggers on either side of the camera (good for left handed people, for holding it tightly or for pointing it at yourself). The minimum shooting distance is about 30cm (and a line in the viewfinder indicates the real shooting area). It has a date/time stamp and a fix-focus option (can be used if you are pointing it without looking, but the external green light indicating successful auto focus makes it a moot point).
This weird little camera with a 24-50mm zoom (f2.8-5.6) is currently sold in Japan under the name Silvi F2.8 and in Europe under the name ZoomDate F2.8 (not sold in the US, sorry). Besides having the widest zoom of any P&S camera, it offers a few additional tricks: an infrared remote control (which I already lost), a self portrait indicator (for when you hold the camera aiming at your face) and two triggers on either side of the camera (good for left handed people, for holding it tightly or for pointing it at yourself). The minimum shooting distance is about 30cm (and a line in the viewfinder indicates the real shooting area). It has a date/time stamp and a fix-focus option (can be used if you are pointing it without looking, but the external green light indicating successful auto focus makes it a moot point).
![[Silvi.gif]
Fujifilm Silvi F2.8](Matos/Silvi.gif)
On the minus side, there is no indication of the exposure time or the aperture, no viewfinder indicators whatsoever, no manual correction or manual ISO setting; so that pretty much forbids any serious use of this camera. The flash settings aren't memorized when you turn it off and I find this is the only real annoying feature of this camera. Maximum exposure time is only about 2 seconds. The zoom is not continuous between 24 and 50mm but only takes 5 different positions. Full specs here.
Left: Test image for the Fujifilm Silvi F2.8 with flash at 24mm - Jenny climbing the 5.9 dihedral at The Narrows, the wide angle really makes a difference 
Onto the performance review now: exposure is good (when the contrast is high, it exposes properly on the light parts), the flash works very well in complete darkness (no white cheese effect, good coverage) and very well to enhance a failing light; but it falters strongly at backlit subjects. The lens quality is quite good: there's a little bit of vignetting at 24mm (visible here) but the optical quality stays very good in the corners. Of course, not having any aperture indicator, it's hard to tell if the max aperture was used (which is when those problems are most visible), but I did take my test images in a dark setting. I haven't tested the flare or the bokeh yet. And the low price adds to this camera's interest. I'd recommend it for soloists.
A digital equivalent of this camera would be the Ricoh GX100 in terms of lens.
![[SB-24.gif]
Nikon Speedlight SB-24](Matos/SB-24.gif)
The perfect companion of the F801s. Mainly it has 2nd curtain sync, strobo... Works well on the F100 too. Very convenient to use in manual mode too because it tells you the distance of the proper exposure. If you find it 2nd hand, it's well worth it as a secondary flash. The buttons are much more convenient than on more recent flashes.
![[SB-80dx.gif]
Nikon Speedlight SB-80DX](Matos/SB-80dx.gif)
The perfect companion of the F100. Smaller and lighter than the SB-24, it offers the same power and functions with more options. For instance the Manual mode can go down to 1/128th power, the strobo mode can go up to 100Hz...
There are also a few additional functions: infrared remote TTL control (in association with another SB-80DX or a SU-4 mounted on the remote flash), internal diffuser plate or external diffuser box (and incredibly when you use them the distance indications are correct on the LCD), FP high-speed synchro (delicate to use on a F100), modelling illumination...
On the bad side, the only thing I can find is that the LCD can be read only when positioned exactly right in front of it (unlike the SB-24 which is readable from any angle); it is thus impossible to read the camera LCD and the flash LCD at the same time, forcing you to move your head back and forth like some brain-damaged dummy.
After a couple years of use I noticed that all four screws at the bottom of the flash are gone. Must be some vibration problem during transportation. Not a big issue but I don't have replacements handy.
Nikon SB-800 [****]The perfect companion of the Fuji S5 pro or the Nikon D200. Almost identical to the SB-80DX in shape and functions the main difference is that it works on more recent DSLRs. The buttons are identical and still as slippery and hard to use with big fingers. The screen is readable at any angle which was not the case of its predecessor. The functions are grouped a bit more logically in the menus which uses weird icon for each function, instead of weird abbreviations. The flash goes to standby mode immediately if the camera is turned off and wakes immediately. There's a [Flash White Balance] function settable on the camera (I'm talking about the S5 pro here), which works if you are not in slow sync mode.
They've changed the remote functions yet again: it's not infrared anymore, now it uses preflash (for some tests of the available remote modes, see the S5 page). And indeed those preflashes are used not only for remote control but also for TTL operation and are just as annoying as the 'red-eye' function wanted by marketting, meaning you'll be sure to get closed eyes on many of your subjects. For instance in rear-curtain, I get the pre-flash in TTL-BL, TTL and AA modes, without possibility to disable it; only M mode gives me a simple flash. I hate that. In front curtain mode, the pre-flash occurs only in TTL-BL mode. Now let's see, the only ways to get rid of this preflash in rear-curtain are either:
The reason for this pre-flash is the following: on traditional film camera, the TTL (Through The Lens) flash process goes the following way: you press the button and exposure parameters are determined (such as duration of the exposure), the mirror flips up, the front curtain comes open, the flash starts firing, a sensor looking at the film measures the light reflecting off of it, when enough light has arrived it stops the flash, the rear curtain closes, mirror comes down and film advances. Apparently the process is different on a DSLR: the CCD has very different reflective qualities deemed inadequate by engineers to measure reflexion off of it (they are shiny, with dichroic filters and moiré effects), so the process has been changed to the following: you press the button, the mirror comes up, a pre-flash starts firing off, the light reflected off of the closed curtain is measured by a sensor, when enough light has accumulated the flash is stopped, the front curtain opens and exposure starts, the real flash starts firing for the same duration as determined during the pre-flash, the exposure finishes, rear-curtain closes, mirror comes down, image is saved. In other words it's a step back and there are many ways this can go wrong: in rear-curtain mode there can be such a long interval between pre-flash and flash that you are not flashing the same subject; and in general the reaction time of kids' or animals' eyes can be so fast that you end up with a lot of closed eyes.
As for bugs:
The SB-800 comes with several convenient accessories and others are available.
SD-800 (supplied)SW-10H (supplied)SJ-1. They are cheap but have a limited lifespan.SS-800 (supplied)SC-29 flash synchro cableSK-6, SK-6A...This is not a flash but an accessory for flash. For a cheap price, it enables you to use multiple flash TTL without strings attached. Very convenient and simple to use. Set the SU-4 on a tripod with a (slave) flash on top set to TTL; take normal flash pics with your camera with a TTL (master) flash on top; the SU-4 acts like a cell-trigger, the only difference is that it cuts off the slave flash when the master stops. And since the master stops when the camera TTL (remember Through The Lens) judges that there's been enough light, you get correctly exposed pics. The most simple way to set ratio is to put one flash closer to the subject than the other.
The catch is that the SU-4 must see the master flash, but the camera must not see the slave flash. It's kinda hard to achieve since the flashes sit on top of each, the easiest way I could think of is to use a cable between the SU-4 and the slave.
It's important to remember that so-called digital flashes for digital cameras always (?) send out 2 flashes: one before the shutter opens so it can determine the exposure and a second one during the exposure. If you use a trigger cell such as the SU-4, it will in all likehood trigger during the first one, thus missing the exposure period. There are some other cells optimized for digital cameras, make sure you get one.
Note: those personal comments are no substitute to real FTM tests as published in some magazines.
Sigma 8mm/f4 Fisheye [**(*)]
Like every fisheye lens you need to have a specific use for it as it doesn't provide 'nice' looking images as it is. I've used it for the following purposes:
Sigma 18-50mm/f2.8 AFD DC EX Macro [***]
My first digital only lens. I wanted something wider than the cheap standard lenses, but not as expensive as the famed Nikkor 17-55mm/f2.8 G IF-ED AFS DX. I hate the fact that there's no aperture ring, but it seems to be the case of most digital lenses nowadays (I also miss the lack of AFS and VR, although an updated version of this lens later came out with the AFS). The zoom ring rotates in opposite direction from all the other Sigma I've owned, which looses me a bit. The macro goes down to 1:2.3 at all focals, with a min distance of 20cm from the film plane (meaning only about 2cm from the front lens at 50mm and not as useful as it seems). The lens is sturdy and feels solid but remains lightweight due to its small size (on the other hand you cannot use it on a 24x36 camera). A reversible lens shade is included, the front lens (diameter 72mm) doesn't rotate. I find the AF quite slow compared to most of my other lenses, so make sure you purchase the AFS version instead.
As for the quality of the images, well, there's a lot to be said about the softness in the corners at full aperture in wide angle position. And when I say 'in the corners' I mean everything around the center area of the image ! Basically every lens is sharp is you use it at f5.6 in mid-zoom position, but push this one in its last position and its sharpness falls apart. That's disappointing.
Nikkor 20mm/f2.8 AFD [****]A good quality wide angle lens (20mm or 24mm, but not fish-eye) is a must have for mountain and scenic photography. Also very useful for groups of people indoors. I do not recommend a wide angle-zoom (like a 20-35) because the many internal lenses cause a lot of flare when the sun is in the corners. This lens burnt in my car but was promptly rebought as I can't live without it. Maybe I should have looked at the cheaper and more recent compatible lenses like the Sigma 20mm/f1.8, but the optical quality of the Nikon is much better (the Sigma was designed for digital cameras).
Nikkor 50mm/f1.8 AF [***]One of my first lenses. I got it for dark / no flash shots. Now I wish I had shelled for a 1.4 or 1.2, although the optical quality is awesome and better than the 1.4. I use that lens for concerts at full aperture or group shots at f8 where the quality must be maximum. Mounted on a digital camera it turns into the equivalent of an 85mm, perfect for portraits.
Sigma 24-70mm/f2.8 AFD EX DG [****]A very useful lens from its range. It is compatible with both traditional 35mm cameras and APS-sized digital cameras (hence the 'DG'). Quality is quite good and the lens is nice to use, although it features neither AFS nor anti-vibrations. Images are soft at 24mm and full aperture. I've had some exposure problems when using this lens at 70mm on a Fuji S5 pro.
Sigma 28-70mm/f2.8 AFD [***]Good quality but quite bulky. Main drawback is the rotating front lens. Haven't had time to use it much though since I bought it only a couple months before it burnt into a car accident.
Sigma 28-70mm/f2.8 EX Aspherical AFD [****]Lighter than the AFD, and more manageable. Strangely, although it is an EX lens, it does NOT allow manual refocusing in AF Single Shot mode on the F100 (that would be the HSM reference). The diaphragm blades came apart when the lens rolled and fell on the floor.
Sigma 28-70mm/f2.8-4 AFD [****]I bought this lens for a friend but tried it for a few days. It is very small and lightweight given the aperture. It has a very nice automatic sunshade.
Sigma 28-105mm/f2.8-4 AFD [****]Just got it for Jenny's F801s and sometimes I steal it to use it up the mountains (lighter weight and farther range than my 28-70/2.8). A very small and convenient all-in-one lens. It has a good min distance (50cm) that allows basic macro.
This was my first cheap lens, 12 years ago. I modified it to take 3D anaglyphic pictures viewable with![]()
This feels exactly like a digital version of the 70-200 HSM, only much lighter in proportion to the smaller sensor. First notice, the soft pouch that comes with it is huge... which pretty much guarantees that I'll never use it. Hell even the pouch of the much bigger 70-200 is smaller ! The other negative is that this lens doesn't have image stabilization; not really a criticism as I couldn't find one of this type of zoom from any brand, but still. Sharpness is excellent, even in the corners at full aperture. Unfortunately it's highly sensitive to flare: not the kind of flare with a sun image in multiple spots, but an ugly whitewash if you have a bright window in the background. The sunshade is pretty much obligatory in that case, and unfoirtunately it's not not petal-shaped, which might have increased its efficiency.
I have read other reviews stating that this isn't a true HSM. I don't understand why they say that: I have no problem doing an auto-focus, then adjusting manually before shooting on the Fuji S5 pro. And by the way this lens doesn't have any AF/MF switch (not something I'll miss). Unfortunately it doesn't have an aperture ring; going with the times I guess. It also works fine on the Sigma 2x APO Teleconverter, with proper AF and proper exposure.
Globally I find it very satisfying, just beware when doing backlit photography.
A big bulky lens with an older generation feel. Good quality. Haven't had time to use it much before it burnt in our car.
Sigma 70-200mm/f2.8 EX APO HSM AFD [*****]Lighter than the 70-210, and more manageable. In particular, it allows manual refocusing in AF Single Shot mode. A great lens for the F100, I love it.
Note 1: the early versions of this lens have some AF problems with the F100. Specifically the AF sometimes stops working in continuous (C) mode, and the only way to get it back to work is to cycle the camera power off and on. After learning that this was an officially recognized problem, I sent the lens to Sigma and they upgraded the firmware, returning the lens within a week at no charge. Good customer service.
Note 2: if you buy this lens, you should seriously consider purchasing also the doubler indicated below for just an extra hundred dollars. They both fit in the 70-200's original case and you end up with a 140-400/f4.5
Sigma 2.0X APO Tele Converter [***]Buyer beware, this teleconverter should have the label HSM on it. It means that it will work only on Sigma HSM lenses on a Nikon camera with AFS capabilities (F100, F5...). It won't work with any Nikon lens and it won't work with any non-AFS Sigma lens. So this doubler works great on the 70-200/f2.8 EX APO HSM AFD for which it was actually designed but it won't autofocus on many other lenses. Just make sure you look at Sigma's compatibility chart before you buy it.
Usual teleconverter disclaimer apply as well: they eat up two stops of light, slow down the AF, decrease the image quality, increase the minimum shooting distance... On the other hand they are much lighter and cheaper to carry around than a 400mm/f5.6. The image quality of this model mounted on the 70-200 AFS is quite good in the center but drops near the edges. The auto-focus is still quite fast.
Here's a sample image taken with the doubler on the 70-200 at max extension. You can see a little bit of softening at the edges.
Lightweight for a 400mm, not overly bright (5.6) and thus slow AF. I got it for taking bird pictures in Antarctica and almost never used it for that purpose because over there you can get so close to the birds a 35mm is enough ! And the focusing ring became loose overtime, making for a very inaccurate focusing, so I tightened it up a bit and now it's okay.
Celestron 1250mm/f10 Nexstar 5i [0]I haven't used that scope enough yet to judge. But even without using it much, during my first tries I managed to burn the hand controller, fry the internal cabling and do other unsavory things to it... Not the fault of the scope, though. C:-( Then later on, after some fixin' I managed to do a little bit of proper observin'. I can't compare it to other scopes because of my lack of knowledge in astronomy, but I'l just say that with a counterweight it can hold the full weight of a modern SLR camera, even while mounted on a Barlow and T-mirror. If used with a 24x36 camera, you get vignetting on the corners but an APS-sized camera like most DSLR provides a full image. One of the problems I've had with it is that the construction is american and the non-metric screws are totally impossible to find in Europe. It's also impossible to find tools to take it apart... and I thought it was illegal to sell non-metric hardware in Europe.
So I've had it for 4 years and I STILL haven't managed to do a proper night with it. First it was too cold and the Goto fried. Then it kept giving me error messages. Then it caugh fire while in Spain. And now after a complete overhaul, it's still fucked up and can't do a proper alignment. I'm so fed up with it.
I used this service for 3 years in the '90s: just give the slides/strips to digitize to Kodak on PhotoCD. Simpler, faster, better and overall cheaper than buying a slide scanner or scanning prints by hands. Drawback is that for high quantity of scans it gets expensive, scans are way too dark and more generally you can't interact with the scanning parameters (dominant colors, reframing...). Service discontinued.
Well, in 1999 we got a slide scanner at work (guess who ordered it...), a CanoScan 2700F, able to scan a 24x36 up to 2720dpi (3888 by 2592 pixels). If you want my honest opinion... it sucks ! I just can't get a noiseless scan. Applying any kind of contrast enhancement filter ends up with a lot of grain visible. Not the grain of the film, the grain of the scanner. Look at some of the wallpapers added in 1999, it's easy to tell the difference, even though the pics have been blurred and resampled down by a factor 3 or more.
Recently a friend told me he was really happy with this same scanner, but on a Mac. And one day he tried it on his PC and it sucked just like mine, so it may be an issue of poor driver programming on the PC.
Nikon LS30/Coolscan III [**]Well, after the Canon I managed to get a much better Nikon Coolscan III/LS30, it has the same resolution as the Canon, but there is virtually no noise. Much much nicer. But the NikonScan 2.5 software sucks big time. I nominate it as the worst user interface I've ever seen: non-standard user interface, no menus, tiny buttons (3 pixels wide !), no use of the right mouse button (I hate Macs), no keyboard shortcuts, impossible to reset the color correction to neutral once you have changed it, control drawers overlapping other things, stupid use of real estate, full of bugs (could not get the thumbnails, had to deinstall, clean the registry and reinstall)... I should probably have used VueScan directly. If you have the same problem with missing buttons, here's something from the very messy Nikon website:
20 Why will the thumbnails tab not display correctly ? (What is Regsweeper ?)
Nikon Scan 2.5 windows version includes a program called Regweeper. This program was introduced to correct a problem when the un-installer does not completely remove all of the components of a previously installed Nikon Scan version.
The symptoms of this problem are unexpected display effects such as the thumbnail window not popping out, or being the wrong size. Should your Nikon Scan interface fail to work correctly, or display incorrectly (buttons not working, windows wrong size or fail to appear) please de-install your Nikon Scan version, run regsweeper and re-install the software.
Also, do not scan Black&White negatives with the ICE (dust removal) option activated. The B&W films containing silver, which reflects the IR beam used for the correction and the whole film ends up as 'dust' (also true about Kodachrome, if anybody cares).
![[MinoltaDualScanII.gif]
Minolta Dimâge Dual Scan II](Matos/MinoltaDualScanII.gif) Minolta Dimâge Dual Scan II [***]
Minolta Dimâge Dual Scan II [***]Got that in late 2000... My first impression is that the software sucks. It crashed 3 times during the scan of the very first slide (and it was the latest version, barely downloaded from Minolta's own website). So I shelled 40$ for Vuescan and it works fine. There is a little bit more noise in the shadows than with the Nikon, but the multipass ability of Vuescan gets rid of it in less than 4 passes (but then it takes more than 5 minutes per scan). I was able to scan, edit and print full 2820dpi pictures all at the same time on a 600MHz laptop with only one USB port !
OK, some observations on the different options of Vuescan (a great program BTW): I test scanned a pictures taken in the mountains with a blue cast, backlit, high contrast and the resulting pics came out OK.
In 2003 you can find this scanner on ebay for about 150$, which makes it a great buy.
Nikon Super Coolscan 4000 [****]Exit the Minolta, summer 2003 starts with a second hand Nikon 4000ED. This time I didn't even bother installing the NikonScan software, although a lot of people seem to like it. The FireWire card was recognized instantly by Windows 2000 (no drivers to install) and the Scanner driver was installed in 10 seconds flat. The good thing about VueScan is that if you change scanner, there's nothing new to learn. Just start Vuescan as usual, pop a slide in and start scanning. The first scan came out perfect at an incredible speed: 60 seconds for a 4000dpi 64bits RGBI with IR cleaning (ICE) and saving as compressed 24 bits RGB TIFF. Having a two-CPU home made PC with a 10000rpm drive helps, though ;-)
Trying to start on the right foot, I'd ordered some Wolf Faust color targets to calibrate the scanner, but although the VueScan help file is quite clear about it I had some trouble getting a good color calibration. A reset of VueScan and a subsequent second try solved it. The scans I get now are the best ever in terms of colors accuracy (the scans actually look like the slides, isn't that amazing ?). The IR cleaning works great for little dust specs as well as for scrapes on the films. The density is amazing (look at this scan) and one of my pet peeves with scanners, the background noise, is virtually absent: the skies are smooth as should be. The only thing that surprised me is the grinding noise of the scanner, very similar to the Minolta.
You can find test images and comments on several other websites and on comp.periphs.scanners, so I'll just give a few comments here. For black & white scans, try much higher values of the black and white points (defaults are 0 and 1) to get better densities.
Tripe. It saturates too much to provide any image in full daylight and it's not sensitive enough to return anything but pure darkness during the night. The only good thing I can say about this cheap webcam is that it works at -78°C.
Ijust received it as part of my 2005 Antarctic winter-over equipment. I haven't used it yet, and I'm not impressed so far: the CD is unreadable on 2 of my CD drives (I had to read it from an old Linux server to install it), the plastic cover proved impossible to remove (I had to use a bottle opener and the cap broke in the process), it looks very amateurish (traces of glue and solder just about everywhere, the infrared filter just falls off if you unscrew the eyepiece adapter), the driver didn't install properly (it took a driver found in C:\Program Files\Common Files\snphv71 instead of the proper one in C:\Program Files\Meade\AutostarSuite\DSI\Driver\2K - XP and then kept BSODing until I forced the installation of the proper one)... I won't be able to try it out on a scope before late january.
Upon use I'm even less impressed: there are no less than 29 lit pixels (and many colored pixels) which would be reason enough to return it if it were not for the fact that I could not, there are 17 dark rings on the image (which go somewhat away if I take darks), very often the camera doesn't work at all and only return garbage (white, black or noise, this is due to a too long USB cable or insufficient power from the USB port) and an unplug/replug sequence is necessary, the advertised Twain driver doesn't work (it's displayed as a Meade LPI which is another piece of non compatible hardware), the autoexposure works only one time out of 5 even on very easy terrestrial images (no, I'm not looking at my next door teenage neighbor).
Finally after many tries, I managed to get some decent images... the day after the electronics of my scope died ! I built a custom mount to hook it up to a photo lens. One good thing is that the DSI works at -70°C without problem, which is not the case with digital cameras.
A very average 2Mpix digital camera. No B-pause, exposure limited to 15 seconds (even if you have to wait an extra 15 to 20 seconds while a dark frame is taken). No TTL flash when in manual mode. The lens has some weird internal shadows quite visible when zooming on smooth areas (like the sky) and it keeps getting worse. Absolutely awful noise when increasing the sensitivity to 400iso. Impossible to focus manually under software control (you can only lock the focus at random). Lens distortion quite high at wide angle and vignetting also extremely high at f2.8. No Raw file format, only JPEG. It's also fragile, I had to take the lens apart a couple times to unlock it. I got this camera on loan so that I could put pictures on my website during my Dome C winterover, and it works well for that purpose, but don't expect much more out of it.
Epson Photo Stylus 1270 [***]![[Epson1270.gif]
Epson Stylus Photo 1270](Matos/Epson1270.gif)
Got that in late 2000. Easy setup. The first print came out virtually perfect. Note that the roll paper holder is not included (for 13" rolls, Ref C811062, the documentation gives the non-existing C811112 reference) but it's not useful for printing panoramas, only for batch printing of multiple pictures.
This is the first time I used a photo printer and I have thus no reference for rating it, unlike scanners. Prints on premium glossy paper are awesome and you can barely see the dithering with the naked eye. On the other hand, prints in B&W have a noticeable dithering if you use the Black option or a color cast if you use the color option. In order to get the best quality out of it, go in the print properties, click [Custom] in Quality mode and there set 1440dpi; you can fiddle with the other options too; save it as 'Best' and use it each time you make a print on premium paper (remember to set the proper paper type too).
I have printed plenty of large panoramas on roll paper and never had to redo one. It's quite fast in 720dpi and silent to. There is minimal difference in terms of quality in 1440dpi mode which I use only for small prints (which are meant to be looked at from very close), but the prints take 4 times longer. You can change the heads in the middle of a print.
For best results, don't use cheap inks from no-name brands. It will guaranty lousy prints (I tried twice) and a higher risk of clogging the heads. The best way to avoid head clogs is probably to make prints regularly (at least one every few days). Also for longer lasting prints, apply a slight coating of Krylon Matte finish Art sealer #1311.
Even though, the prints don't last very long. After a few years they begin to fade.
Epson Stylus Photo R1800 [****]With this new printer I decided to get serious about color management, so I got a Colorvision Spyder2 monitor calibration device, a WolfFaust slide target and proceeded to calibrate the whole chain: my usual Provia 100F film, scanner, monitor, graphic app, printer and paper. Some steps are not particularly intuitive, like when the Spyder2 software crashes at the end and I have to manually add the created profiles in the [Control Panel][Display][Settings][Advanced][Color management]. Also for printing on the excellent Moab papers, I had to load the icc profiles provided by the company in [Settings][Printer and faxes][Epson Stylus photo R1800][Color management] and add the Moab profiles for your papers. While you are there also add the AdobeRGB1998.icc profile so you can directly print images using Adobe RGB. Also in [Settings][Printer and faxes][Epson Stylus photo R1800][Printing preferences] there's a very well hidden [custom size] in the paper dimensions. There you can define new paper sizes, like A6 which is missing from some of the formats. Here's a Moab paper chart:
| Driver | Paper | Official Profiles | Personal Profiles |
|---|---|---|---|
| Watercolor radient white | Entrada fine art bright | EntradaB | My Moab profiles measured with SpyderPrint |
| Entrada fine art natural | EntradaN | ||
| Premium glossy photo paper | Kokopeli photo gloss | KokoG | |
| Premium luster photo paper | Kokopeli satin | KokoS | |
| Kokopeli semigloss | KokoSG | ||
| Premium Photo Paper Glossy | Canson Infinity Platine Fiber Rag 310 | Canson profiles | My Canson profiles measured with SpyderPrint |
| Canson Infinity Photo HighGloss Premium RC 315 | |||
| Canson Infinity PhotoGloss Premium RC 270 | |||
| Ultra Premium Presentation Matte | Canson Infinity BFK Rives 310 | ||
| Canson Infinity Edition Etching Rag 310 | |||
| Canson Infinity Rag Photographique 310 & 210 | |||
| Canson Infinity Rag Photographique Duo 220 | |||
| Canson Infinity PhotoArt HD Canvas 400 (*) | |||
| Premium Photo Paper Semi-Gloss | Canson Infinity Baryta Photographique 310 | ||
| Premium Photo Paper Luster | Canson Infinity PhotoSatin Premium RC 270 |
(*): Some of the papers above is pretty thick and needs the following settings in the printer: go in the [Maintenance] tab, then select [Printer and Option Information (O)] and activate the [Thick paper] option. Then go back to the [Main] printer menu and select [Manual - Roll ] in Paper & Quality options. Then you need to install the Single Sheet Guide on the back of the printer, insert the paper and press gently until you feel the printer grab the paper and put it in position. In addition to this, some papers like the Canson Infinity PhotoArt HD are very soft (it feels like a kind of fabric) and I couldn't get the printer to grab it. The solution is to use the thick paper option, the single sheet feeder on the back AND to put the sheet on top of a rigid but not too thick paper like the Canson Rag 210 and push BOTH of them inside the printer.
When printing AdobeRGB images in Paint Shop Pro X, proceed this way: Close all images; [File][Color Management][Color working space] and select [AdobeRGB1998]; open and work with your image, do not enable [File][Color management][Color management]; [Print][Properties][Advanced] and select the proper paper, [ICM] with the following options: [Driver ICM], Input profile=[Adobe RGB (1998)] and Printer Profile=[Moab KokoS R1800 UC] for instance. That's about it, the prints should match the screen, just know that the printer preview window does not take color management into account, so it is likely bland. Remember to set the input profile back to sRGB for 'normal' pictures.
This being said, I get excellent color prints on satin and glossy paper, but the black and whites and not that impressive. Epson has a better printer for this purpose, the Stylus Photo R2400. For B&W, the best settings I can recommend is to use the [Advanced] driver and [Photo Enhance][Neutral Gray] along with [Photo RPM]. For color prints, it's not necessary to go [Photo RPM] as [Best Photo] does the same quality much quicker. At first I could not print borderless on A6 paper, but the reason is that I had to define this as a custom format instead of using the close but not quite right 4x6".
The printer comes with roll holders but they are utterly useless: unless a roll is half empty, it won't fit in the holder. Then there's the issue of the drive with 3 options: [Roll - banner mode], [Roll - cut sheet mode], [Manual Roll]. The user's manual is mute about the difference. I can't seem to figure out how to print various size images one after the other on roll paper. The printer tries to eject the paper after it prints. Yeah, right, just try to imagine the mess and the waste... If I try to print 2 images one after another without first feeding the paper, cutting it, rewinding, ejecting and loading it again, I get the driver message: "Paper fed incorrectly - Press the roll paper button to return the paper to the correct position". Just doesn't make any sense to me. I used roll paper on my old 1270 and never had any trouble. So the solution is simply to pre-cut the sheets to the right length and to add a dimension option of length 33x112cm (even for smaller paper), which is the max possible on this printer.
![[Samsung191T.gif]
Samsung SyncMaster 191T](Matos/Samsung191T.gif) Samsung SyncMaster 191T [*****]
Samsung SyncMaster 191T [*****]With my eyes getting blurry after a few hours on a standard CRT monitor, I had long wanted a quality LCD monitor, as I can't afford a plasma screen and don't want to wait for large OLEDs to make it to mainstream. A large monitor, one I could place far away against the wall. A good one that wouldn't display weird colors on pictures. And finally one that wouldn't be too expensive. After jumping on a sale of this model, I did not regret it. Not a single dead pixel, so bright that I usually have the brightness set only on 3 out of 100, convenient screen rotation for reading documentation, wide viewing angle, 1280x1024 resolution, but can't comment on the response time as I don't do games. What I couldn't figure out is the color calibration software which gave me awful results, but the color quality was great without it...
This monitor has two kinds of inputs: digital and standard. I also have a video card, the ATI Radeon 9000 Pro, which has two outputs: digital and standard. So naturally I connected each and the difference is an eye opener. In digital each pixel is a very precise little square with no bleeding whatsoever. In normal mode the pixels bleed over each others, the image is much less readable, details in images disappear... In other words a good monitor is nothing without a good video card.
After 3 years of use I now notice that the right side of the screen is a bit darker than the left and middle. I guess a part of the backlight system is going down, although it's a very small difference. After all this screen has been around the world twice and has sit outside in a box at temperatures that would freeze any 'liquid' crystal display.
After 6 years of use, my Samsung 191T was showing its age: the brightness was getting uneven and there were marks just like on CRTs of old. Unfortunately, there's no way to degauss here. So I decided to change it and go for an extra 5". I'm not entirely happy with my choice of a Daewoo, but the price was extremely cheap, so let's review it:
So what's my opinion ? I'd say it's good for the price and the dimensions but it absolutely requires a calibration. Also I now need a bigger desk !
After a short time of doing digital photography, you start to notice that the colors you saw are different from the colors displayed by the tiny screen of the camera, yet again different from what you see on your monitor, to say nothing about what ends up in the tray of your printer. The solution to this is to calibrate the whole chain. It used to be done 'by eye', or with very expensive calibration devices. In the last few years the prices have began to come down on this kind of equipment and the Spyder2 was, in my sense, the first affordable screen calibrator.
How it works is simple: you plug it into a USB port, start the software, answer a few questions about the type of screen you are using, you then put it on your screen while the software shows various reference colors. It then creates a color profile file, adds it to your monitor profiles and launch a program at startup to use that profile.
Is it worth it ? Absolutely, even on a good monitor, the difference is quite huge, particularly for black & white images or for skin tones.
At the time I found it quite expensive, but it has gone down in price a lot, with newer versions of both the hardware (Spyder2pro, Syder2express, Spyder3) and the software (still compatible) coming out every few months. The software was also a bit buggy, usually failing to add the profile to the monitor on the first try. If this happens, just go to [Control Panel][Display][Settings][Advanced][Color Management][Add] and there navigate to C:\WINDOWS\system32\spool\drivers\color to add the corresponding ICM file.
Datacolor/Colorvision Spyder3 Studio [***]I must say that I'm not too impressed by this costly combination. I exchanged the Spyder2 which was only for screen calibration for this combination that does screen and printer. The software has improved: it's easier to use and much faster... provided you don't try to use the fancy modes, in which case I can guaranty you'll get lost and end up with a shitty calibration. I least I did.
As for the printer calibration, if you use the paper recommended by the printer, you don't need it (say, Epson paper with Epson printer). But for some strange combo such as silk screen prints, yes, it comes in handy. Overall it takes a lot of time to master this system, the results do improve, but if you only stick to standard prints, it's a waste of money.
Here's how to get it to run a calibration on Linux.
![[Rollei_MSC300.gif]
Rollei Twin Vision MSC 310](Matos/Rollei_MSC300.gif)
Slide projector with two lenses allowing for easy and immediate fading between slides. The good thing is that you can keep your slides in normal trays and use them directly (no need to separate left/right). So if you project slides in changing settings (like other people's projector, that's a big plus). The optical quality of the default 90mm lenses is very good. If you move around a lot like I do, it weights a lot less than two projectors and fits into a standard camera backpack. The large/thin slide selector is hidden on the carriage arm and not accessible unless you turn off the projector in the middle of a motion.
In this newcoming digital era, are slide projector still useful ? You bet they are ! With digital you now do almost everything with quality or price (not both yet) but you cannot project images with good quality. For instance in 2004 the top Sony digital projector costs $5000 but has only 1366x768 pixels. It's less than what my monitor can display, it's much less than what any halfway decent digital camera can do and it's so much less than what's on a good slide...
The main drawback of the MSC projector is that some types of slides often get stuck, and it's a pain when it happens. First of all the wide/narrow slide grabber at the end of the arm is impossible to reach in normal operation. To change its setting, put a tray in the ready position and press [focus]; the arm moves out and remains out letting you adjust the grabber. Now when a slide gets stuck, here's a fairly hidden procedure to get it out:
With the ubiquity of digital photography, I decided to give a shot to online photo album printing services. Well, I had a hard time finding even ONE that can do the most basic things, like resizing an image. First there are 2 categories: you either download a program (usually Windows only) where you prepare your pages or you do it online. Prefer the 1st solution if your images are large. The 2nd if you aren't windowed. Here's what I've tried:
Overall I give 2 stars (out of 5!) to Cewe and none at all to the others as they are worthless. And all those programs are great at making you waste time with their ugly non-standard interfaces (no standard menu on any of them).
Now how to proceed when preparing a photo album ? First prepare all the images as JPEG in a single directory. Rename them so they are more or less in the order you will want the in the album (A000.jpg, A001.jpg...) and keep the names short as many apps will only display the first few chars of the filename. Prepare a specific image for the cover. You might also want to 'touch' the files so they have their last modification dates in order, as some progs sort files by file name, other by last modification, other by exif date taken. 'touch' is a unix program used to changed the date on a file, available as part of cygwin.
One of the paradoxes of the global market, is that if you are in the US, it's cheaper to mail-order in Europe, because you don't have to pay VAT, and if you are in Europe it's cheaper to visit New-York with some empty suitcases and the magic phrase "Nothing to declare" on returning home... Here's a quick list of stores I've bought stuff from with good prices and customer service:
Amazon.comOn the other hand, stay away from Cambridge Camera, they tell you: "Yes, we have that in stock", and two month later you are still waiting. You tell them to cancel an order, they ship it anyway. Your mileage may vary.
